There is no denying that the iPhone is an expensive phone. Apart from the excellent security features it has to offer along with its ground-breaking software programs, one of the major reasons for its popularity is its camera quality. iPhones capture the best pictures when compared to any other Android device. Maybe that is the reason why professional photographers sometimes start their journey by investing in an iPhone.
When you spend over USD 1000 on a phone, you want to make the best of it. In this blog, we teach you 4 ways to blur photos on iPhone and improve your skills as a budding photographer.
When we say that iPhones have the camera quality, we are not just saying it because everyone else is. It is because there are technical proofs that back such claims. Let’s discuss some of them, before learning how to blur photos on an iPhone.

1- Apple products are made of Sony sensors, the best kind that is currently on the market
2- Apple has got just the right alignment and integration between its camera hardware and software
3- iOS processing is the fastest among any other image-processing software programs
4- Nothing in the market comes close to the image signal processor employed by Apple. ISP is like the brain of the iPhone and this is the make-or-break deal with any camera device
Imagine you have clicked amazing pictures of yourself posing with the loved one and while browsing through them you like the photos but not their background. Obviously, in such cases, you will not delete the pictures but try to figure out a way to blur the background to make the picture look appealing. If you are an iPhone user or just simply trying to edit pictures on an iPhone, here are 4 ways you can do it in a few seconds.
We will be discussing this in two segment
#1- How to blur photos when you are taking a picture with an iPhone?
1.1 Use the Portrait mode in the phone’s camera
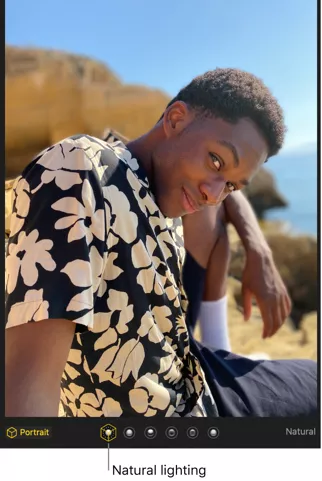
By far, the most effective method of blurring the background of the photo when it is being taken is using the Portrait mode of the camera. The main function of the mode is to blur background images (Company people know what their users desire). Portrait mode is not only available on iPhones but almost all the latest Android smartphones as well.
Apple started incorporating Portrait Mode when it launched iPhone SE and in all the later versions that came after it.
Listed below are the simple steps you can follow to blur the background of an image:
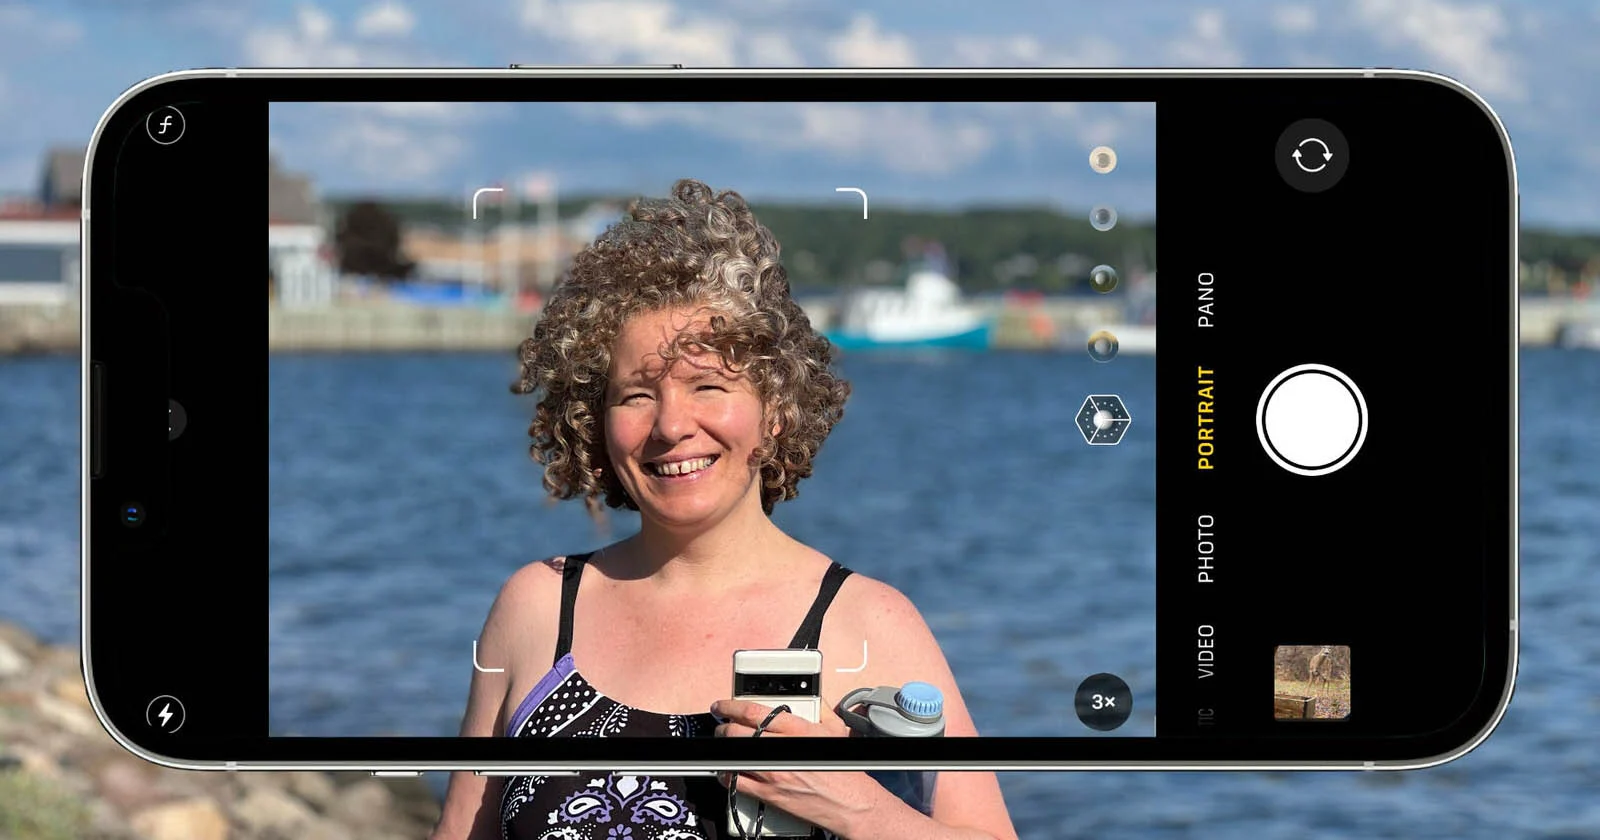
A- Launch the camera app on your iPhone and go to the Photo option
B- Select Portrait Mode for capturing the image
C- When you select this mode, the iPhone will automatically suggest some effects that you can use to enhance the overall aesthetics of the image. Choose the one you prefer
D- Once you have the picture in frame and portrait mode setup, click on the shutter button
There you have it. All you have to do is follow the 4 simple steps for a perfect image but less detailing of the background. The only problem is you might not get the desired quality in low-light settings and you will receive a notification that the light is not enough.
1.2 Move closer to the subject of the photo
This one is more of a manual process than technical because here it’s the person clicking the picture who has to put in a little extra effort in getting the desired result. For instance, the Portrait mode fails to deliver as you expect or maybe you want to try something new on your own while clicking a picture. The next best thing you can do is to move close enough to the subject of the image that the background automatically gets blurred.
Technically speaking, the distance between the camera and the subject should be between 0.5 to 2 meters and involves a little bit of a trial and error method to figure out the best range at which they can get the best outcome. The only tip is not to get too close to the subject because you will not be able to get the depth for the right field effect. Nevertheless, this method works and it’s only the first time you might struggle a bit to get the accurate range.
#2- How to blur photos with an app once the picture is taken?
Maybe you want to blur the background after you clicked the picture. There are ways you can still do it.
2.1: Use the in-built photo editing feature of the iPhone

iPhone provides an inbuilt feature for editing images in the photo gallery using which you can edit the pictures as much as you like. Here are the steps to get the desired results:
- Launch photo gallery on your iPhone
- Locate the picture you wish to edit
- Once the picture appears on the screen, tap on the Edit option present on the display. You will see a square below the picture. Drag and select the light effect of your choice
- You can drag left or right to try everything that iPhone’s photo editing tool has to offer
- Once you are satisfied with the result, click on the Done option to save all the changes you made
If at any point, you feel that you want the original picture back, the iPhone gives you the option to do so. On the picture, all you have to do is select Edit and then click on the Restore option to bring back the original picture as it was.
2.2: Use an external photo editing tool
The last resort to blue photos on iPhone is to use external powerful photo editing tools that can give you a better result with more options to choose from. Some best photo editing apps for iPhones are
- Adobe Lightroom
- Lens Distortions
- Snapseed
- TouchRetouch
As for our final words on the topic:
Pictures and videos are ways of reliving memories. They help us cherish the moment and time that might never come back and hence we understand the significance these pictures hold in our lives. In this blog, we have provided you with 4 ways to blur photos on your iPhone which may help you add a layer of sparkle to an already happy moment. We would also like to caution our readers against overly edited pictures that are far from reality and to always draw a line between enhancing the look of the image and changing the entire perspective completely.